How To Make a Chair Planter
Learn How To Make a Chair Planter out of an old unused chair . This is an easy weekend upcycling project and a great way to brighten up a dull corner in your home/ garden or create an interesting focal point for visitors at your front door.
If you like to have something different in your home, then you will love these chair planters.
Sometimes we come across old chairs that we simply cannot use for our home. Some maybe old and not sturdy enough to sit on. Will we throw them away ? We could, but hold on ! You can grow plants in them and use them to brighten up a dull area in your garden.
But what if the chair looks too plain? Then paint it , and you will get a fabulously decorative item. If you’re planning to use it for a garden be creative and play with the colors.
Do not limit yourself to just one color – try combinations. Below are some pictures for inspiration.
And then scroll down for a full tutorial on how to make your own DIY Chair Planter.
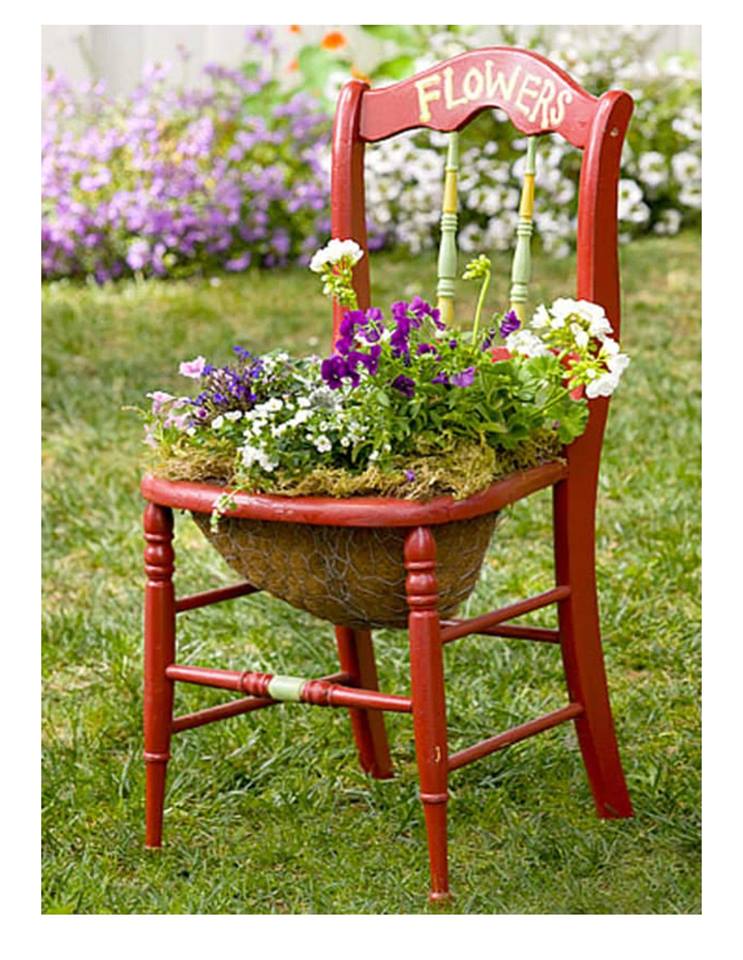
- This is a great way of also using up the last bit of paint you have in your tin. A pretty multi coloured chair.
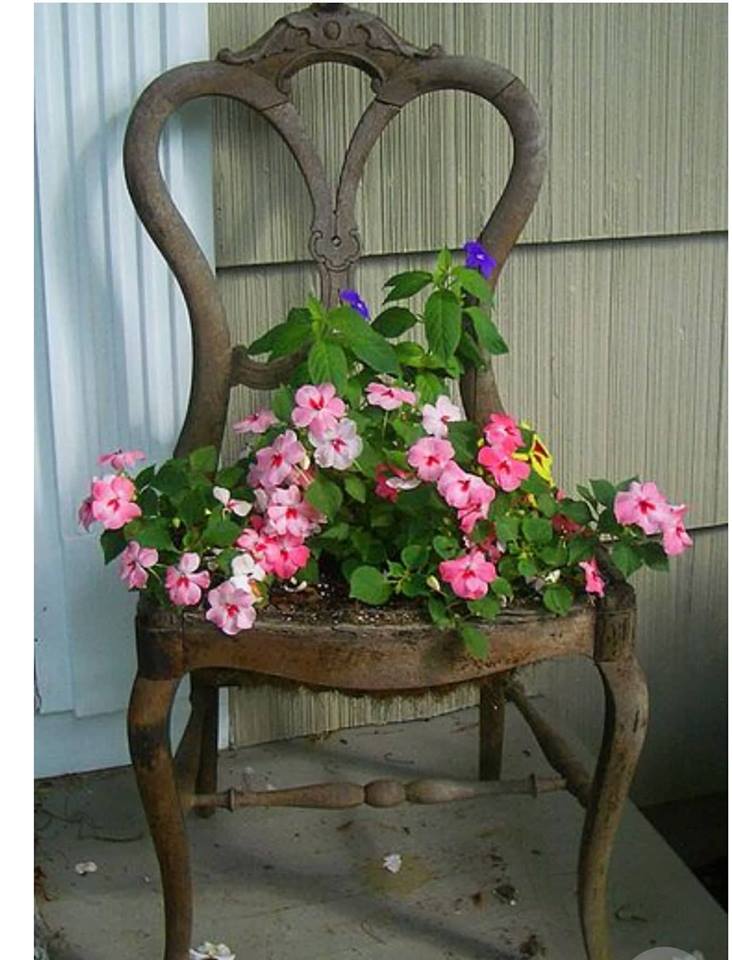
 2. But who says it needs to be painted at all ? Sometimes it has a more rustic feel if its left as is. I would suggest you use an outdoor varnish to seal it from the elements though, otherwise it will deteriorate very quickly .Outdoor Varnish will protect it from water and UV rays.
 3. Remember our 90ml Tester Pots will do a full chair and we have some of the brightest boldest colours that will brighten up any garden. Last year I choose Shabby Deep Pink for my chair planter, but this year I am going for Shabby Blue Danube, as I love blue teamed with pink and purple flowers. But even black is stunning, as you can see. So use what you have and get creative. .

How to Make a Chair Planter
What you will need:
An old wooden chair
Screwdriver for removing seat
A pen for marking the pot size
Jigsaw and drill for cutting the hole
Paint if required or Varnish if no
Potted plants
1. Choose a chair
Find an old wooden chair that is no longer in use. If you don’t have one yourself ,you can pick up a chair for free or very cheap in a charity shop or jumble sale.
2. Removing the seat if it has one
Turn the chair upside down and remove its seat by loosening the screws with a screwdriver. Remove all covering and tacks until you only have a wooden square.
If your chair is missing the insert ,you can simply buy a small piece of MDF in a diy store. Measure the square of where it is to go and simply cut it to size.
3. Cutting a hole for the pot
Measure around the pot a little below the brim to find its diameter . Draw a circle with a pen the same diameter in the center of the seat. Cut out the circle with the help of a jigsaw.
4. Painting and decorating
You can skip this step if you have a rustic looking chair. But if not, paint it in one or many colours that will suit your and your home. You can choose your plants before hand or afterwards. I find there are plants to go with any colour you should choose so its not something to worry about.
6. Place the pot and plant
Place your pot into the hole and check it fits. Remove the pot again and fill it with compost. Pick a combination of plants to grow in your chair planter. Usually people grow an upright plant in the middle and trailing plants around it. I didnt plant mine as I have a local garden center that does lots of pots of mixed flowers in the summer. This makes the job even quicker.
Below is an even easier version.. Simply paint up your chair and a basket to match. Plant the basket with flowers.

Or if you have bedding plants that grow tall, think about using your chair planter as a support in the middle of them and letting them grow around and through it. 
The above photos were all versions we found on pinterest. But we love to see your photos. Please tag Shabby.ie in your projects and we will share them on our social media platforms and our website, where we have a section dedicated to customer photos.
Hope you enjoyed that Aileen XX