How to Paint Interior Doors
How to Paint Interior Doors
by Aileen of Shabby.ie

After the huge reaction I got to paint the teak front door, I decided to continue with doors and show you how to deal with a few different types of internal doors. BTW you can catch the Teak front door HERE ( revamping the weather door was a present for my friend and she loved it !!! #bestpresentever)
Below are the details and here is the full video too….
So lets look at 4 different types of internal door. I used the same paint on all the doors and I pretty much prepared them all in the same way. The only big difference was the PRIMER I used. Have a read of this….
1. Woodgrain Veneer which is probably the one that people would fear the most ,as veneer is known as a difficult surface to paint. WHY ? Because paints don’t adhere well to veneer, but if you prep it right and use the right primer then you wont have any problems. You might also see these doors on furniture as they were very popular at one stage and this is how you would prepare them for painting.
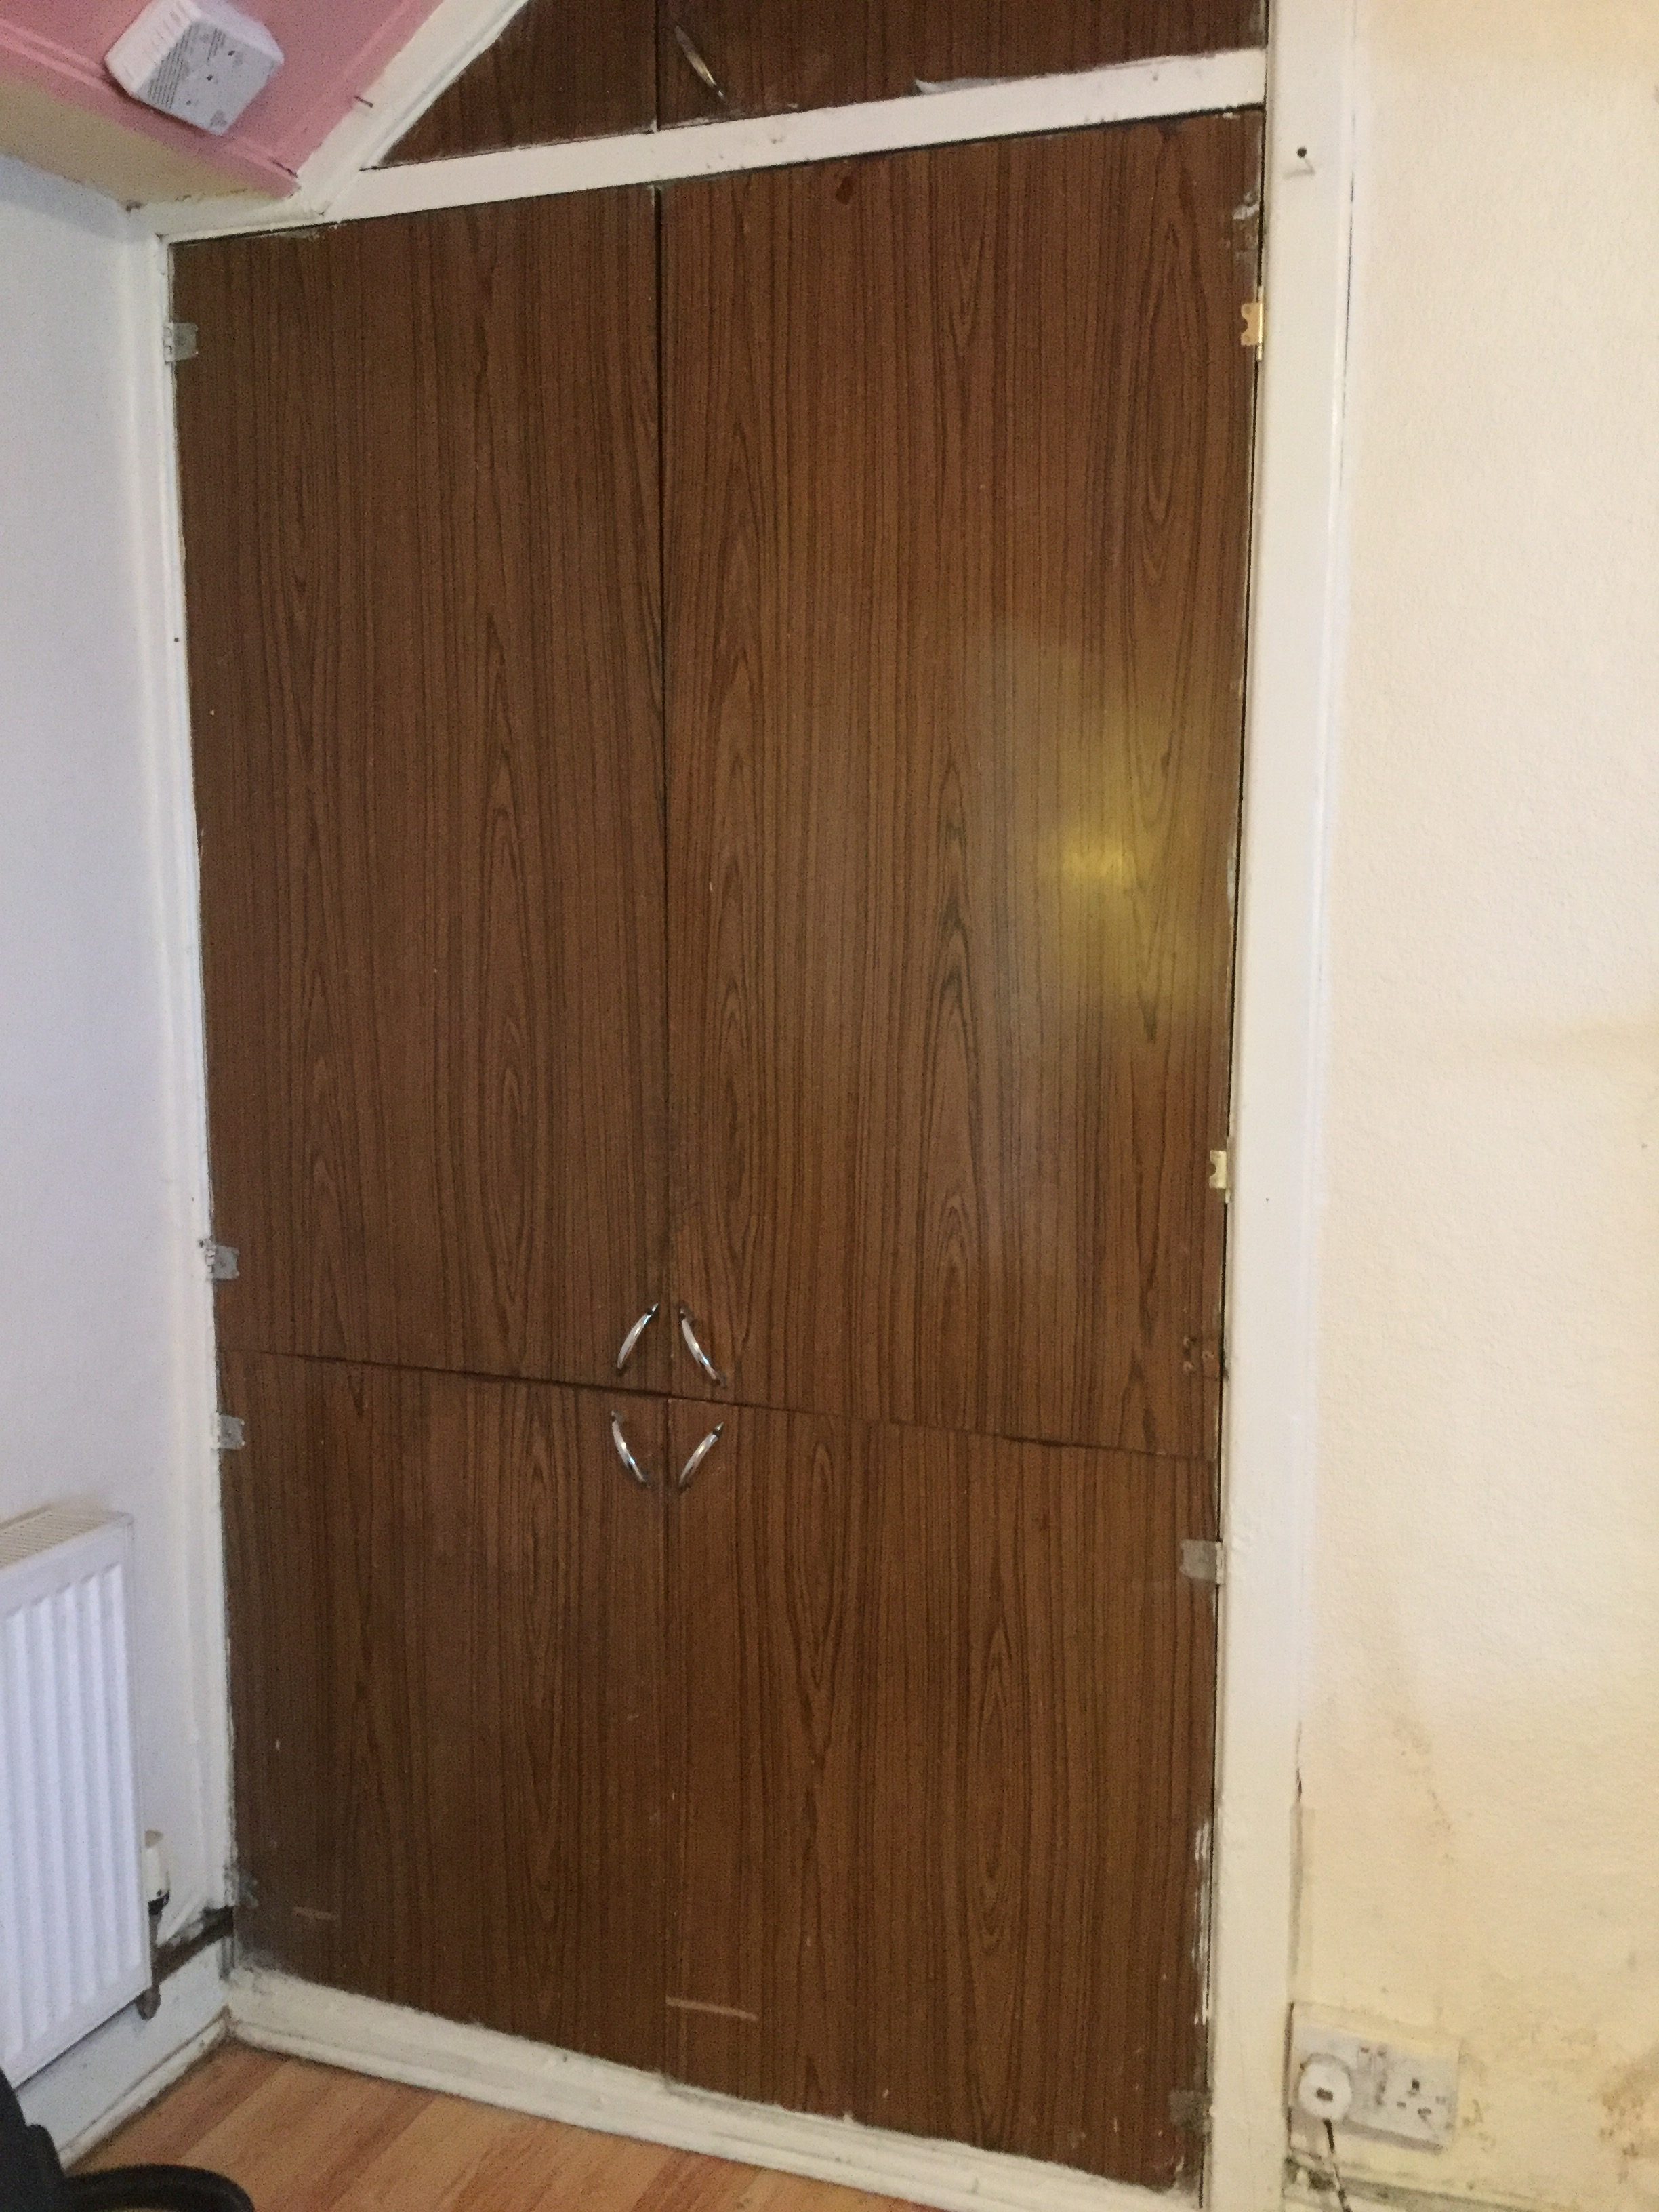
We prepare the veneer by cleaning it first with a 50/50 methylated spirits and water in an old shower cleaner bottle. Spray it straight on and rub in with a sponge. Dry and wipe off any excess with some kitchen roll. 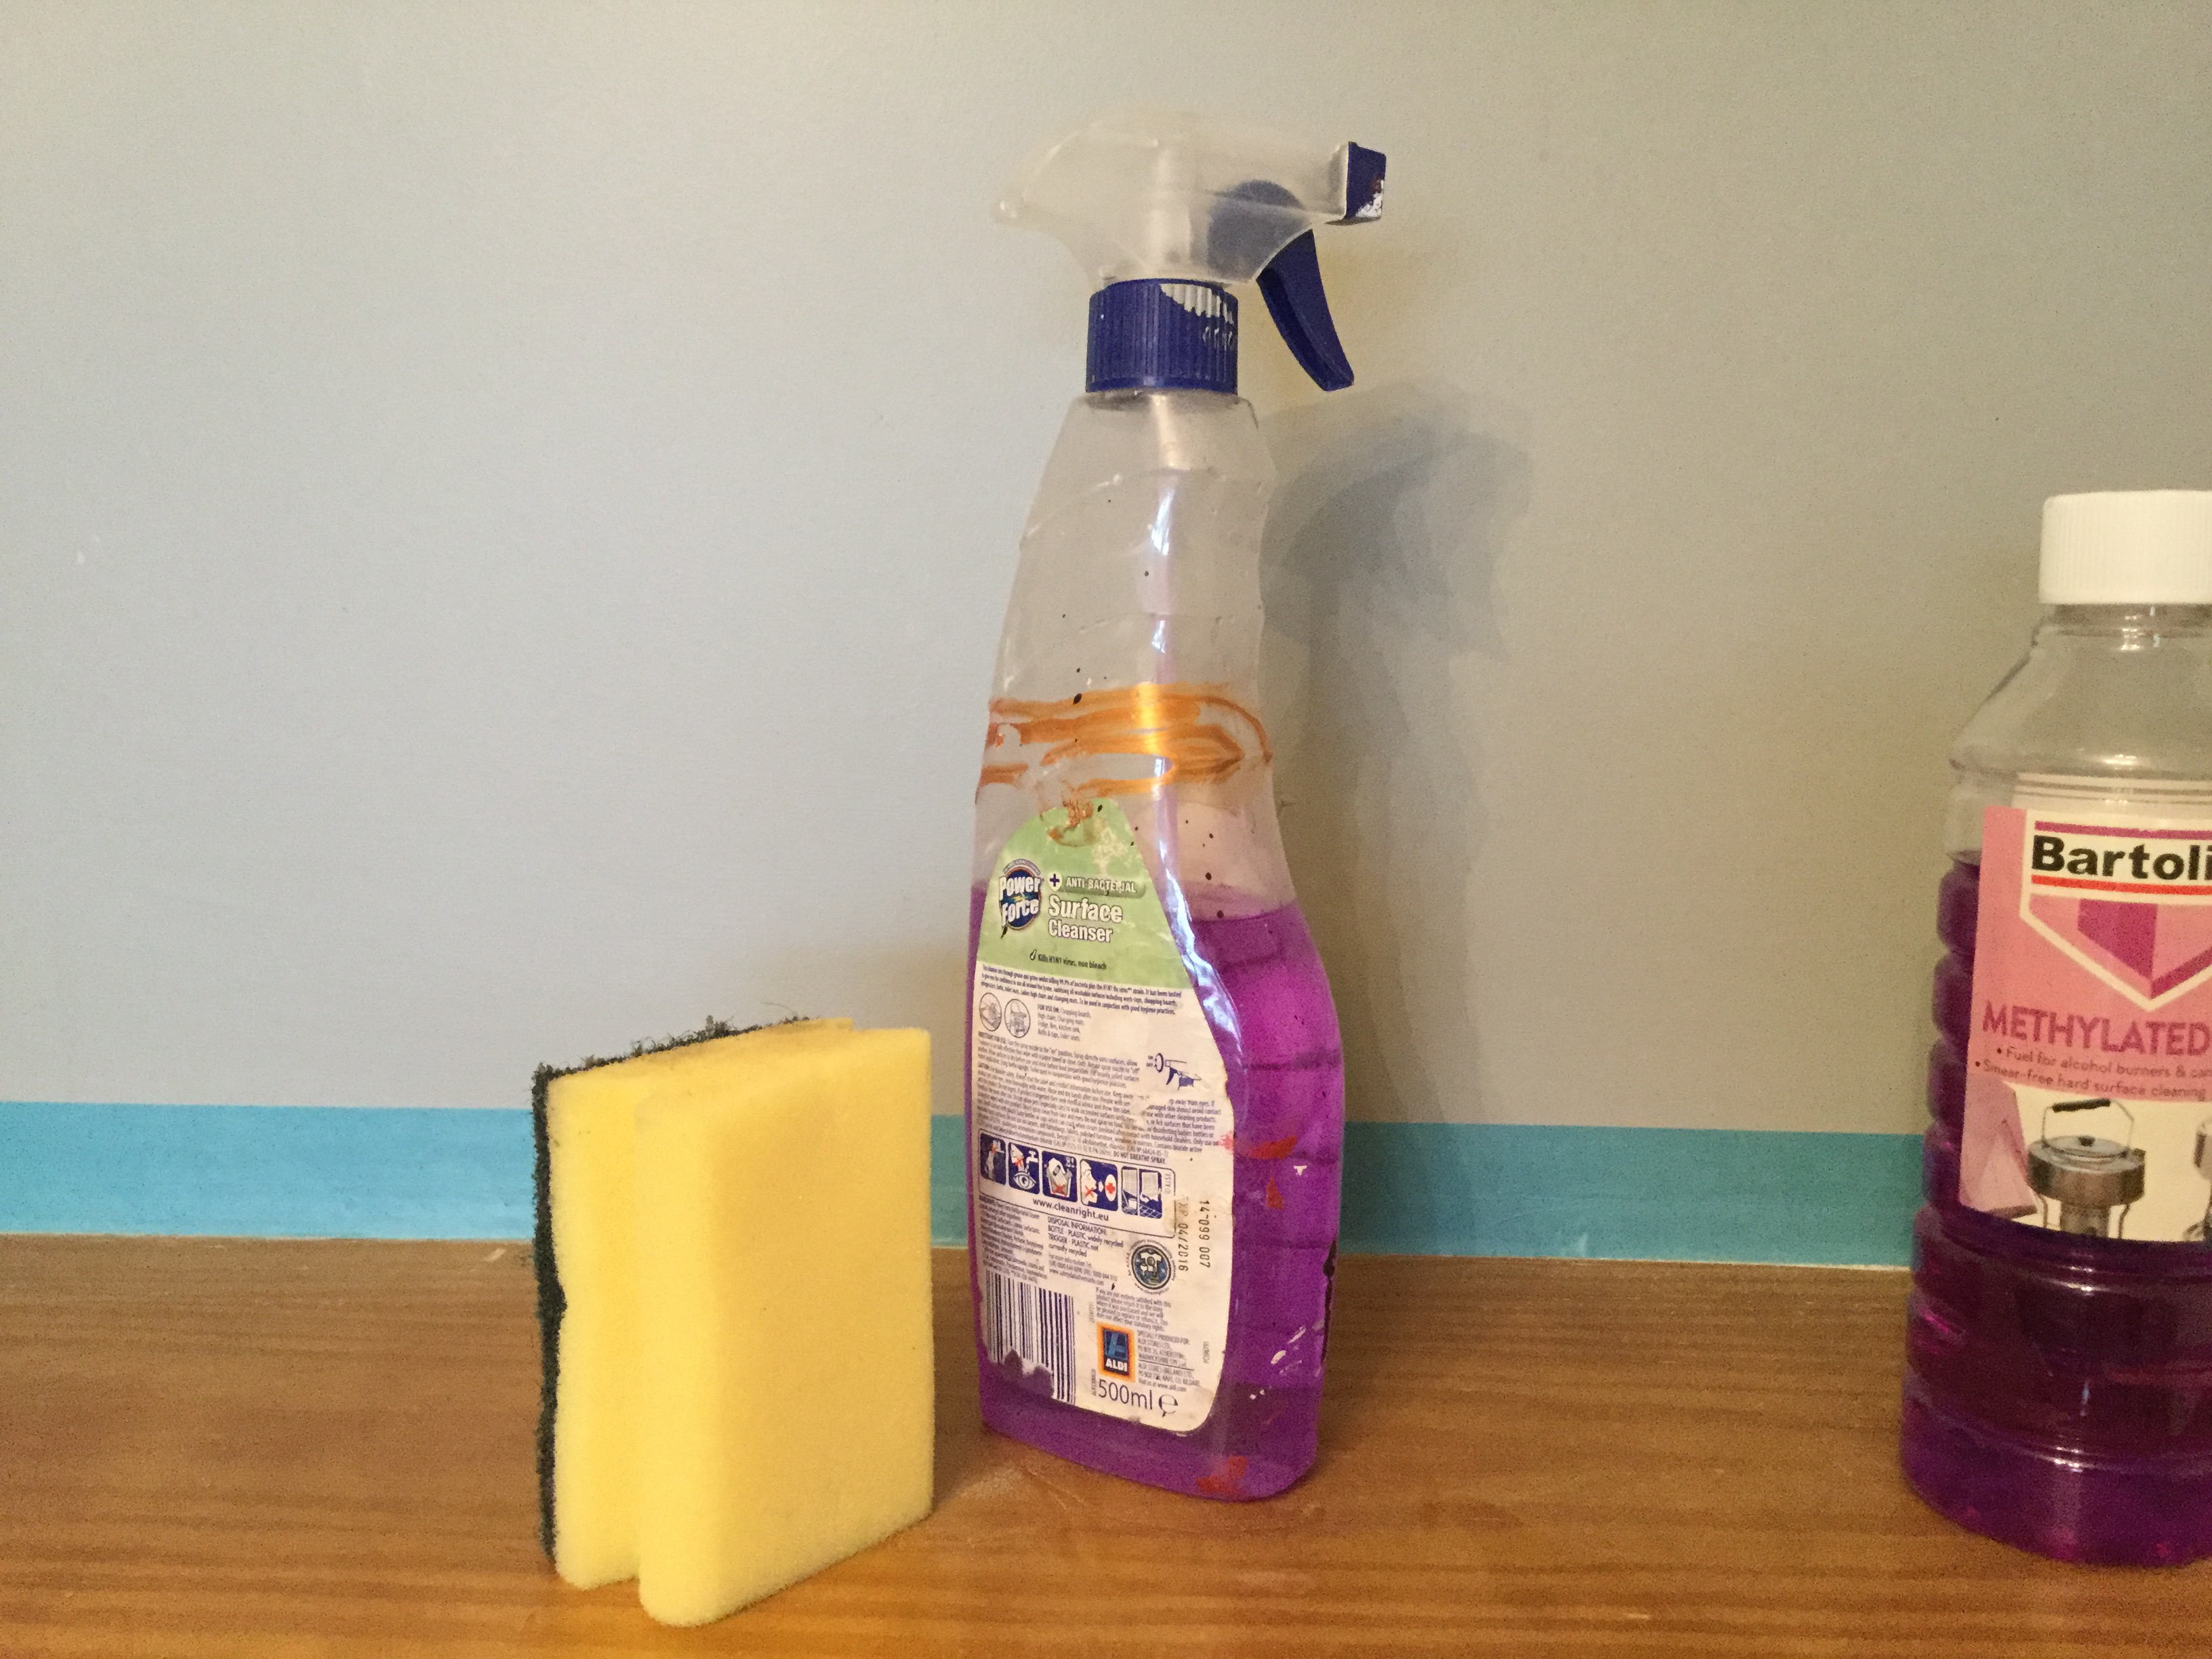
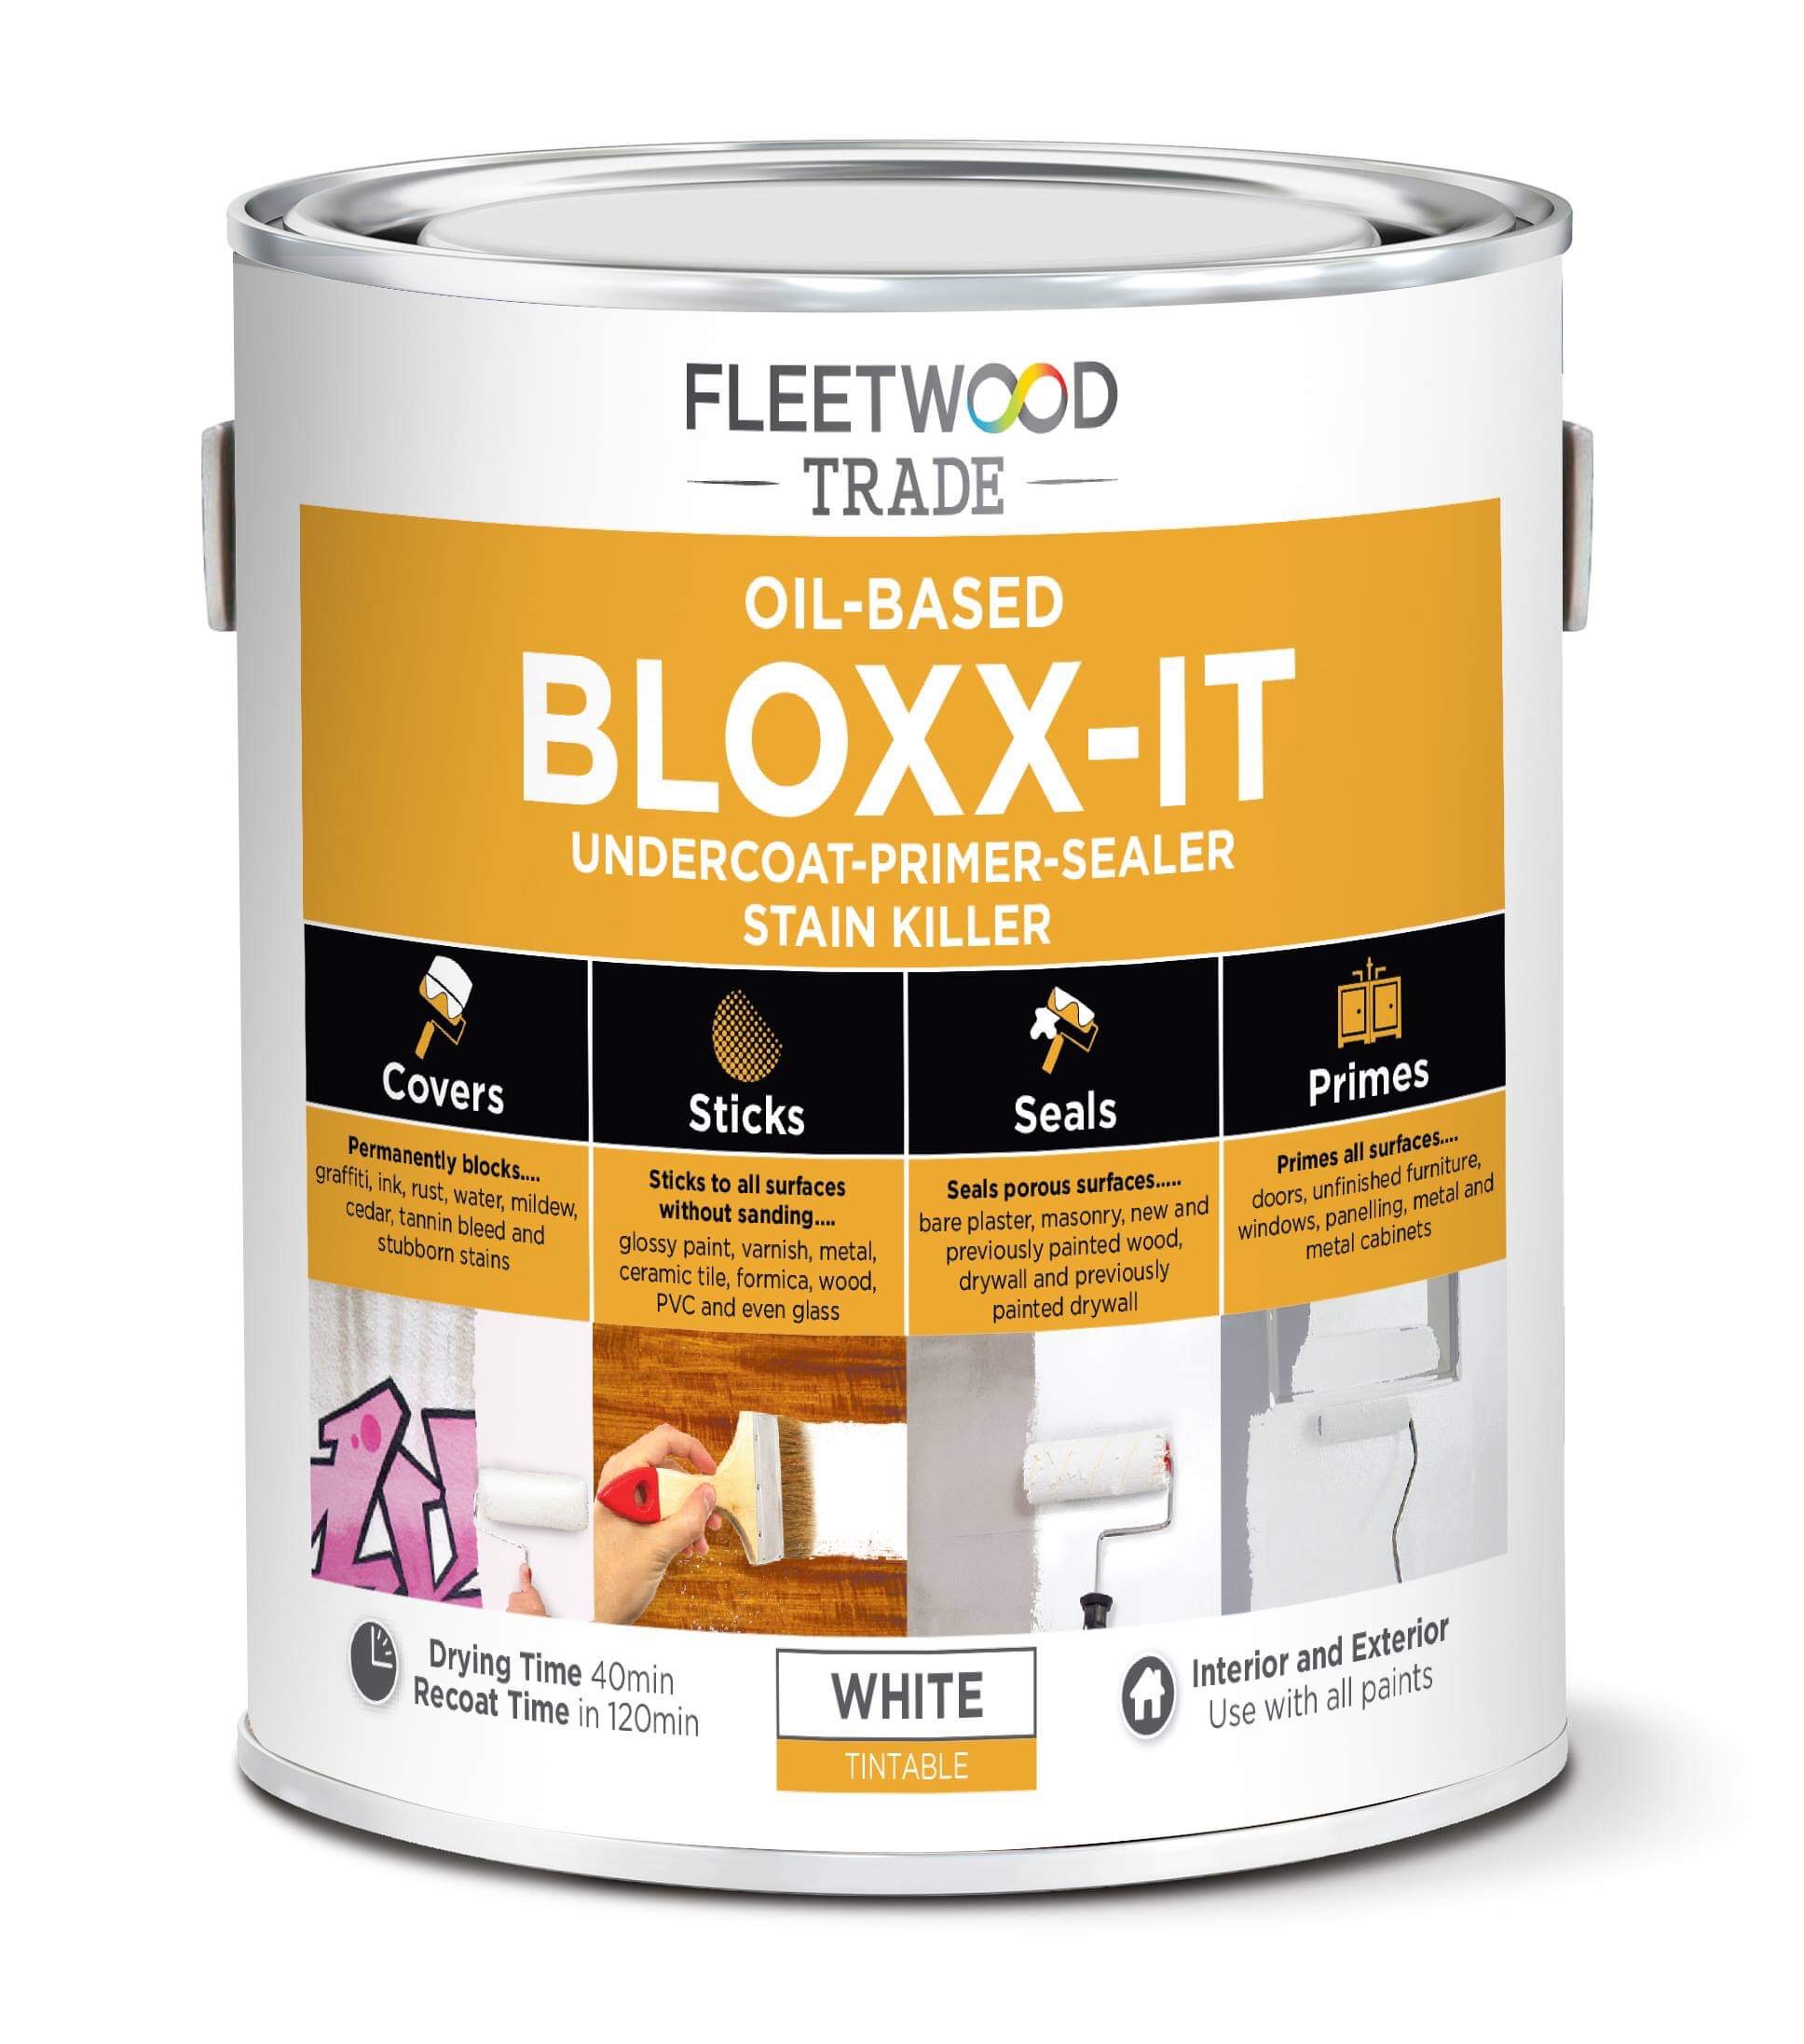
Lightly scuff sand the surface to create millions of little scratches on the surface of the veneer and then roll on your primer. The best primer for adhesion to difficult surfaces it Bloxx-it. Its an oil based primer and you will have to clean your brushes with white spirits afterwards. TIP : Lining your roller tray with tin foil and then you wont have to clean it afterwards.
 Here’s what they look like after a lick of paint…. much better !

2. Sold Wood Raw Pine Door
These doors paint up so well . Look at the difference ( I have not removed the washi tape in this photo) I have painted many of them in different houses and they always improve the look of the room. For this door you again need the same primer as it is also fantastic at sealing in knots !!


If you don’t seal in those knots , they will come through your water based paint in a few months. You could also use another product call Terminator.  Terminator is a shellac primer especially for sealing in nasties. I have used both with great success , so whichever you can get your hands on easily.And just like the Veneer door I cleaned , sanded and them rolled on the primer using a small brush to cut in. I left it to dry and then gave it a second coat to ensure all those knots were were sealed in, before going in with my paint.. I will discuss the paint I used later.
3. Previously Painted Door ( painted in gloss paint)
I get asked a lot about this. Some of the projects are doors and others are kitchen chairs would you believe. I get asked it you have to remove all the old paint first. God no ! Can you imagine…?!?! What an awful job that would be. If you are painting it all you have to do is clean it as above, but this time i got my sander out as i knew i could be a little rougher with this door. The finish was uneven and had large drips of paint that were now like cement, so out came my mouse sander and it did two jobs in one…. it created millions of scratches for my primer to sink into but it also flattened out the brush marks and drips from the previous 10 paint jobs !

This time I did not need to seal in any nasties and my sanding has removed a lot of the high sheen from the previous paint so i went in with my water based primer. You could of course continue to use the Bloxx if you have it. But otherwise use this one as the clean us is easy and its very quick to dry. You really should have a tin of both of these primers in your house for all DIY painting job. You will always need one or the other.

4. New Paneled Door
These doors usually come primed now but if not then you will also use the GRIP primer on that one.

Now that you have your door ( whichever one it is ) cleaned sanded and primed, its time to start painting.
For all my internal woodwork ( not furniture, for that I personally prefer eggshell ) I choose the Advanced Satinwood and here are MY reasons why:
1. Its doesn’t have as high a sheen as other brands of satinwood. I like a sheen for sure, but not shiny !
2. The white does not go yellow over time ! That drives me insane so a big tick in that box ..
4. Its washable and hard wearing and you need this when you are kids fingers and dog paws and all the other things that family life brings to a home.
 The colour is of course one from my own range and its called ‘ Shabby Pure White’ . Its not a brilliant white that you would put on ceilings but its a lovely clean white that makes the woodwork look new again.
You can purchase this in the eggshell finish or in the satinwood from www.shabby.ie or Fleetwood stockists around the country.
As this paint is self sealing that was my hob done. I removed the washi tape from all areas and cleaned up my brushes and rollers and stood back to admire my work ! A job well done.
Hope this has give you inspiration for a little DIY of your own.
Aileen 🙂