Iron & Wood Garden Bench Makeover
Iron & Wood Garden Bench Makeover
Last week I started the ‘Iron & Wood Garden Bench Makeover’. It was Easter week and the sun had finally come out again. This poor bench was looking a bit tired, dirty and unloved and as I had inherited it from my Father , I wanted to bring it back to life.
I have a lot of emotional attachment to this bench, as it sat for years outside my parents home and everyone who visited, would sit and have a cuppa in the sun. Including myself, many many times. I remember my Father changing the wood on it. I suppose after a decade or so, the wood weathered to a point that it needed replacing while the iron work will last forever !
You can see what I started with, rough weathered wood and iron work that is dirty and paint chipping.

 STEP 1 :
So the first thing i did was sand the wood with my palm sander with a medium grade sandpaper . Some of the stain came off, but more importantly the wood leveled back to smooth and all loose bits came off. I then used a superfine sanding pad 22o grade to smooth it even more.
STEP 2 :
Then I gave all the iron work a good wash down with a sponge and a 50/50 ,mix of methylated spirits and water. This improved the look so much ! You dont realise how much is actually DIRT !
You can see the difference above after just the cleaning !
STEP 3:
Now I wanted to prime the wood and seal in that dark stain. I used the best primer for the job and that is and oil based primer called BLOXX IT and I rolled on two full coats to get very good coverage. You can buy this in your local Fleetwood stockist or online HERE

STEP 4 :
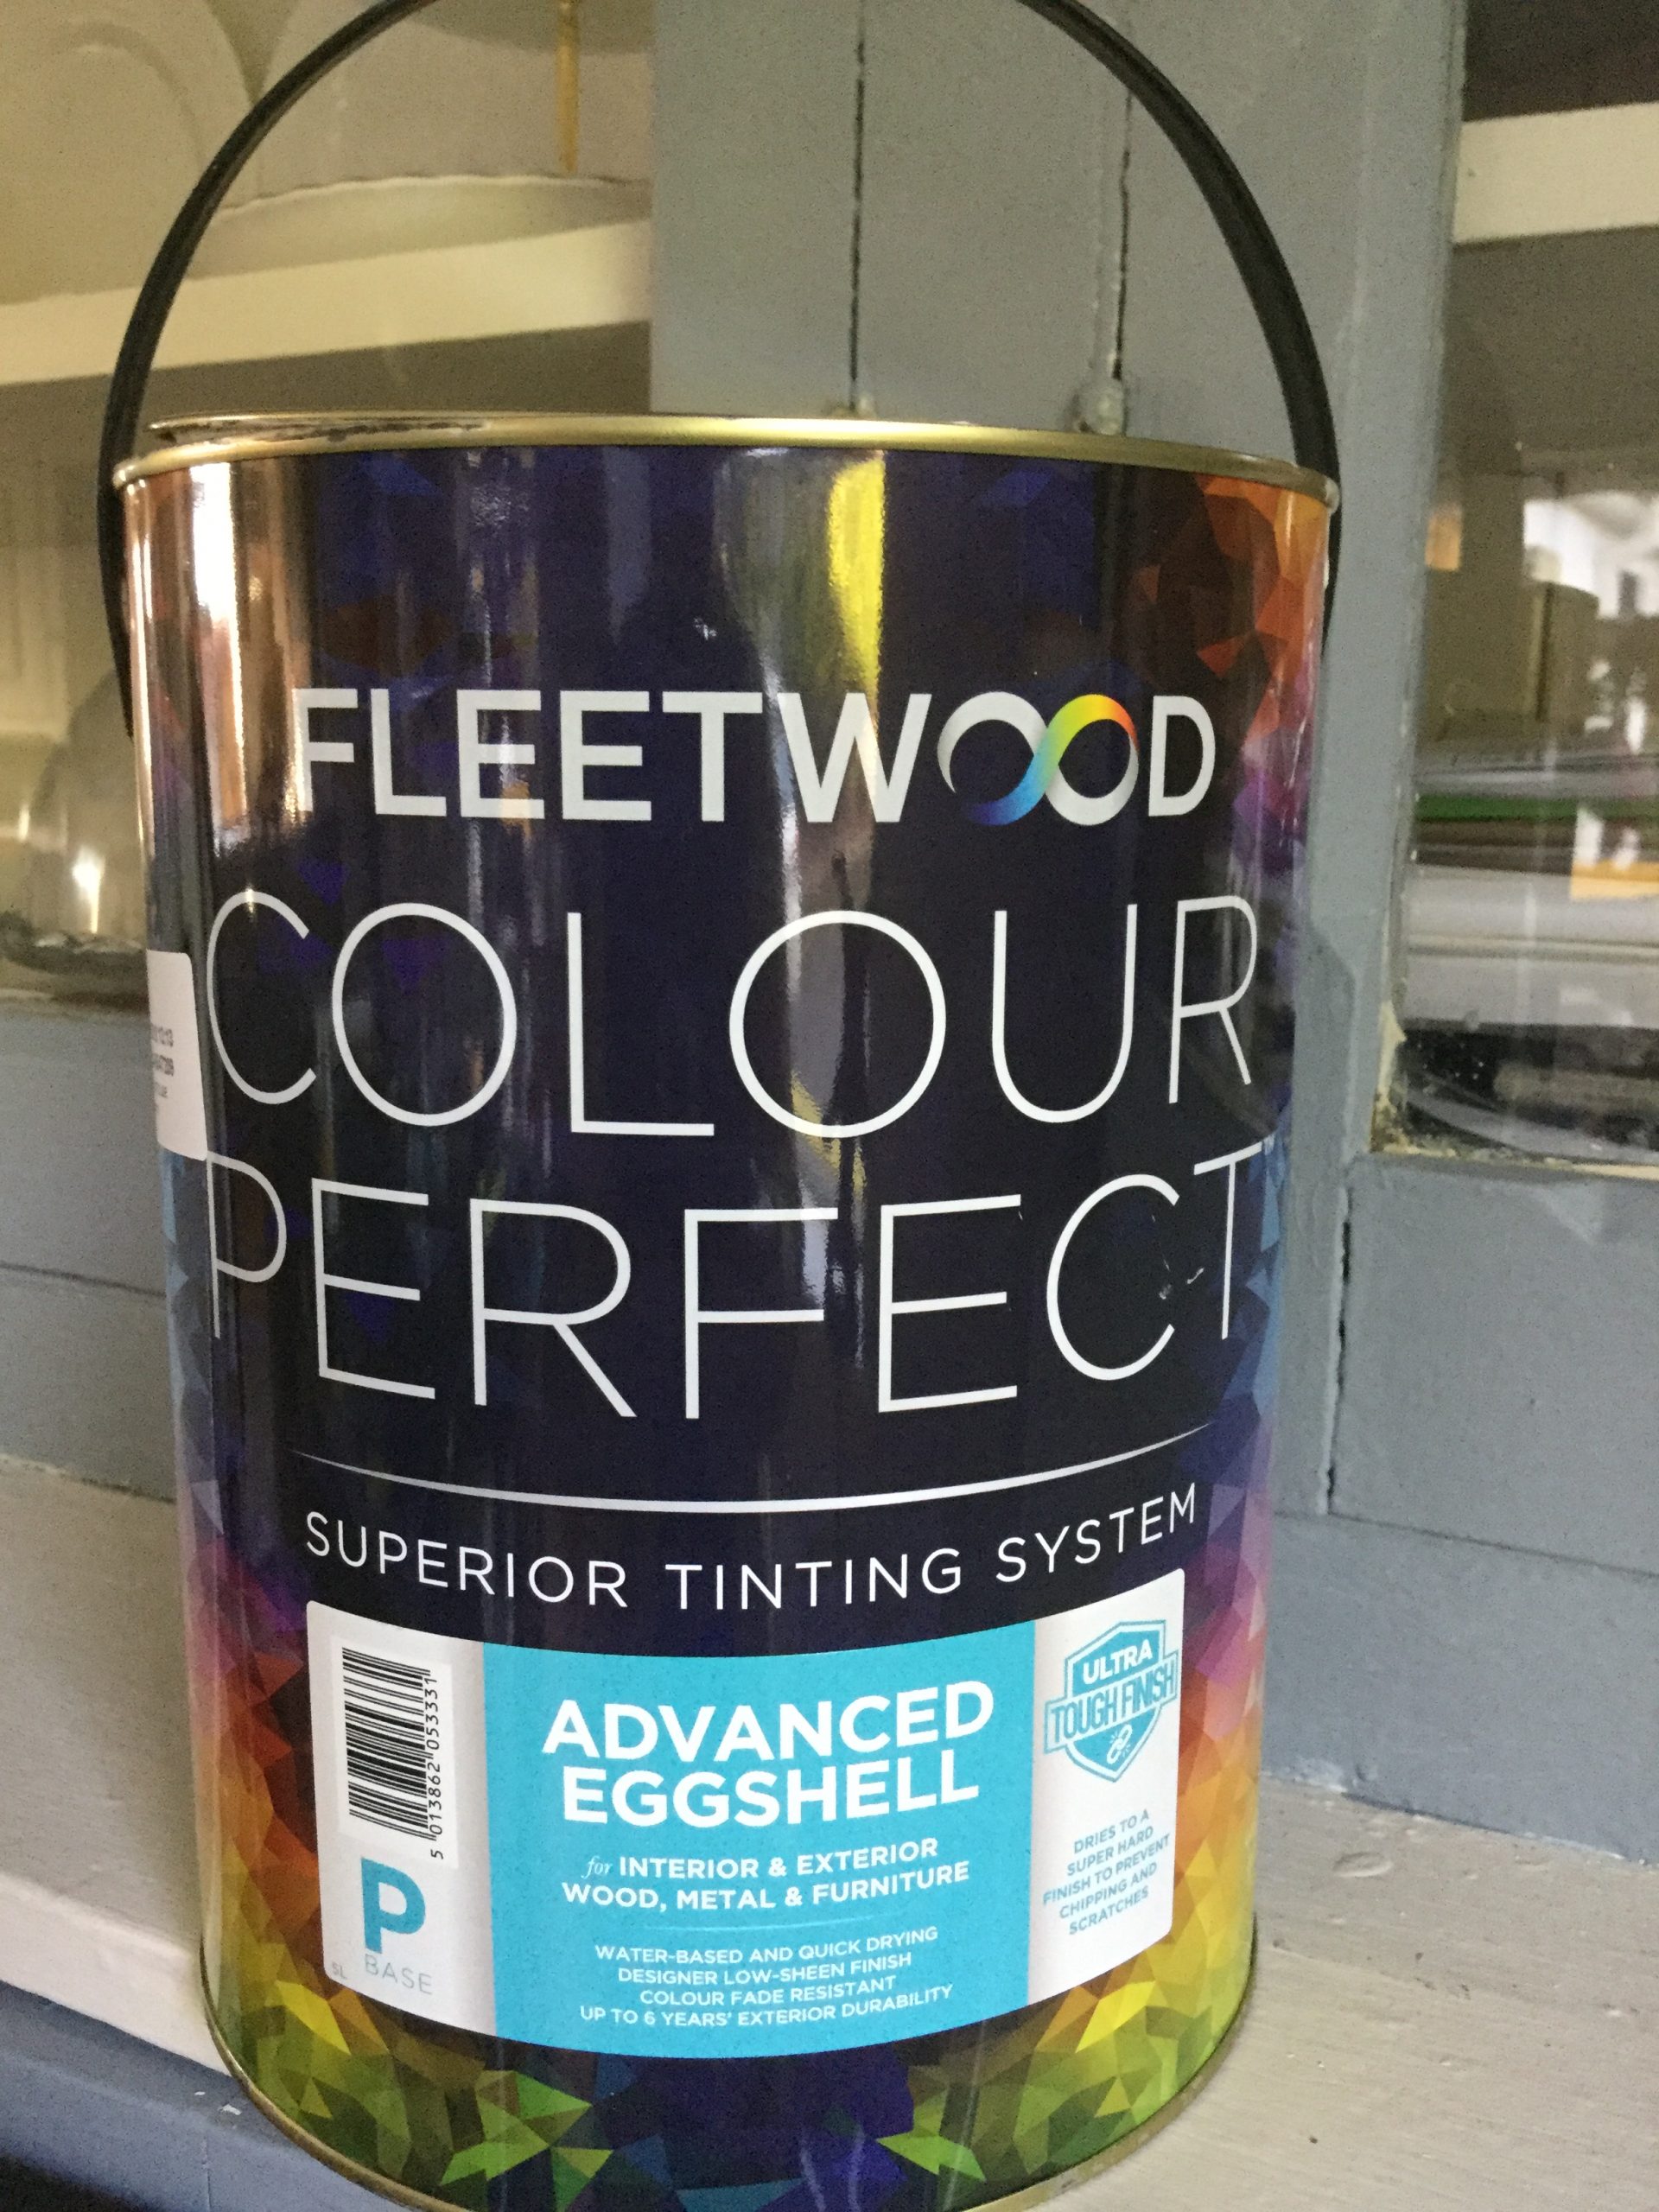
The next step was to choose which colour. I went for a bright colour to liven up the garden and a colour that I knew would look good with red geraniums and roses., The colour I chose was Shabby Teal, from my paint collection for Fleetwood Paints. I used the advanced eggshell finish. That or the advanced satinwood are perfect for the job.
CLICK TO SEE PAINT COLOURS HERE
STEP 5 :
For the iron work I used a paint especially for metal and one that will go over rust ! very important. There wasn’t much rust on it but i didn’t want to have to get those little bits off !
Here’s a photo of the product and I got it in my local hardware
 I wanted to go for black as I felt it was a richer colour than white and would go well with the teal. And here it is all finished !! Delighted with it. Yes a bit of work, but it was a labour of love as it means so much to me. Its almost like my Dad still sits beside me when i have my cuppa now outside my back door.
 Hope this will encourage you not to discard your garden bench but to give it a little love and a lick of paint.
AILEEN