Painting A Leather Chair
By Valerie Ann Parr
Step By Step Guide
I want to share my first ever attempt at Painting A Leather Chair and my first attempt at blogging about one of my projects, so do bear with me !
I want to share the chairs story, as she has been a part of my family for 40 years . Yes she is a little worn and a little tired but still very much loved and still very sturdy and strong.
I live in the cottage in the Irish countryside and she fits right in with my decor and I was not about to let go of her in a hurry. So I thought a little bit of TLC might give her a new lease of life.
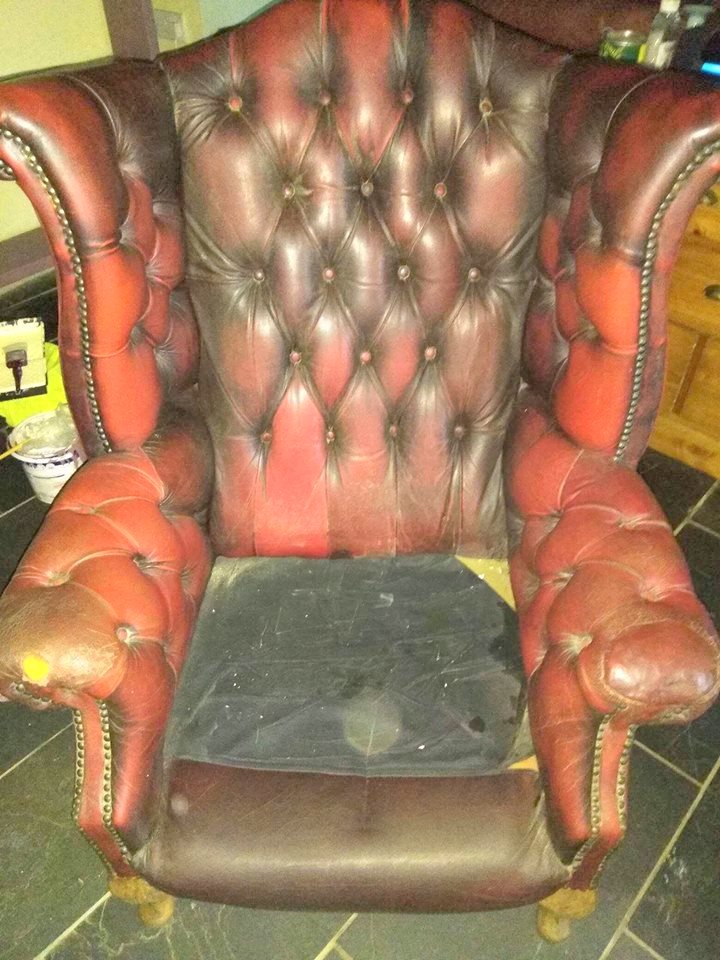
After much thought of what to do, I decided to paint her, as I had seen fabric and leather furniture painted and it seemed to look really good.
What I Did First…
So to prepare the chair for painting I did the same as I do for my wooden furniture… I cleaned first. I gave her a wash down with sugar soap in water and let her dry overnight. The next day I cleaned her with half and half mix of mentholated spirit and water ( denatured alcohol for you guys in the USA) and wow ,was I surprised at how much dirt came of her.
I then let her dry for another 4 hours .

What Paint I used..
So now it was time to start painting. Now I know people have used chalk paint on fabric before but I use a harder wearing paint on my furniture , the new Fleetwood For Furniture Range . Its super easy to use on wooden furniture and gives such an incredible finish that and I was keen to see how or even IF, this paint would stick to leather.
Also the most beautiful colour had just been added to the new collection, its called English Mustard and thought it would be the perfect mix of old and new.

No Turning Back Now….
As I started to paint her, I decided not to water the paint down as I had seen others do with chalk paint. I was confident I could do thin layers of paint, plus this paint is such good consistency , I didn’t think there was any need . These pics are of my first stage …

I was committed now… no going back !
Looks a bit scary at first ,especially as you have to do THIN coats and you can still see the original colour coming through, but stick with it and allow the colour to build up slowly.

I let the paint dry for 6 hours before giving her another coat.. these pics are 2nd 3rd coats and you can clearly see the colour building up. Also remember I was going from a deep shade of brown to a lighter shade of mustard.
Starting To Look Good..


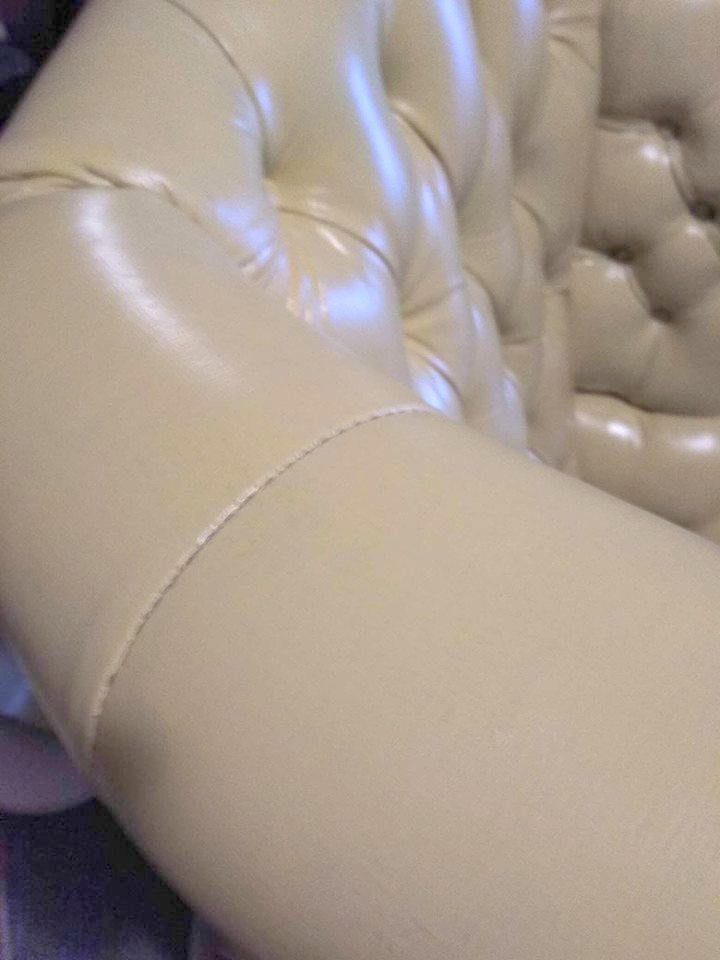
I used soft cheap paint brushes to apply the paint as there was a lot of ridges on this chair, so no point using and maybe ruining my good brushes .
I kept building up the colour until I got the depth of colour I wanted. Six coats all in all and you would think that six coats would use a lot of paint but no ! Less than a third of a tin. The coverage on this paint is incredible!
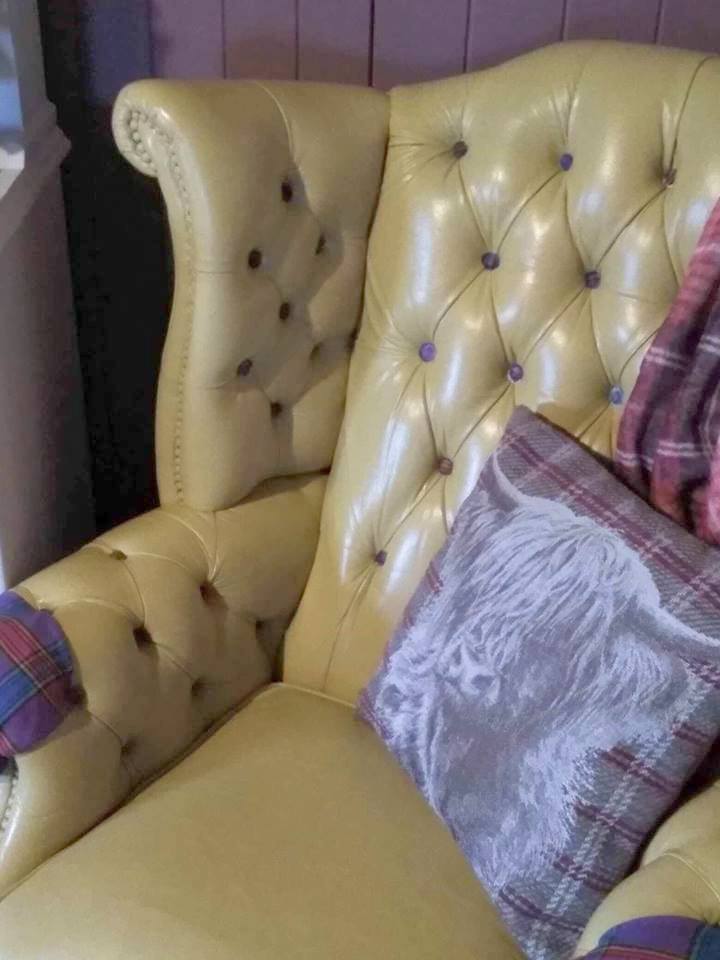
The Finish…
This is her finally finished 6 coats in all, then a final coat of bees wax. Her arms had little or no leather left so I added some fabric to them.
I really hope you like her as much as I do now that she is all freshened up. She is a little ray of sunshine on a dull day. Filled with happy memories and now , ready to make some more.


This leather on most of this chair was quite dry and stiff and still the paint covered it lovely. On the back where the leather has had no wear and tear, the paint went on even better. It really was not a difficult job, just make sure you let the paint dry in between coats and apply it thinly.
Question I Was Asked & A Note On Waxing
I was asked did the paint stick in the creases of the fabric ?
Answer: The creases on this particular chair are quite tight so I did not have a problem there. But where the paint did stick was where I put the seat pad back in.
However it touched up very easily and when I bees waxed it at the end, this stopped the problem. I used natural bees wax and applied it with a cloth. I left it to dry for 1 hour, then buffed up. You really can’t tell that this chair has been painted. I showed it to my sister last night as she thought I had got a new chair !
Hope you enjoyed my chairs little story. I think she is beautiful again and I look forward to many more years enjoying her as part of our family.
Val xxx