Window Feature
Window Feature
Here’s how I created a window feature in ONE day for under €20 as per my INSTAGRAM STORIES
As promised here is the blog and all the details you need to give this fabulous project a go.
So what started this ? Well I wanted to create a focal point at this end of the room. I had continued the wall colour ( Dunleer Mill by Fleetwood Paints ) around to the sides of the room and not just on the main chimney wall but the old teak window looked so dated.
Here’s what it looked like:

I went onto Pinterest and looked up ‘Framed Windows’….. very quickly I found this really helpful photo. Cannot give credit,as I couldnt find the original source of the photo.

I intended keeping the window sill ( window board) and it went out beyond the window by 4.5inches . See the first photo. Therefore I knew a 4 x 1 was going to be perfect for the boards either side of the window. Then I needed a 2 x1 board and I knew I had some 3 x 1 scrap wood in the garage. So off I went to my local hardware and bought one length of 4 x1 and 2 x 1..total cost €17. These boards are planed pine.
I came home, measured and cut the wood into 7 lengths. Now let me try to explain what I put where.
Step One
I cut two lengths of 4 x 1 for either side of the window, These were cut to the exact length of the window. I then put them up on the wall using NO MORE NAILS adhesive. 
Step Two
I then measured the full width across the top of the window including the side boards and cut one 2 x 1 and one 4 x 1 to that length.
The 2 x 1 was placed like a shelf over the window so it sticks out a little. I pre drilled a couple of holes either side so that when I was up the ladder , it was easy to then add a small screw . This secured it to the 4×1’s underneath. Of course I also used no more nails on the back of the board, that was against the wall. Over this I put another 4 x 1 flat against the wall. See photo below
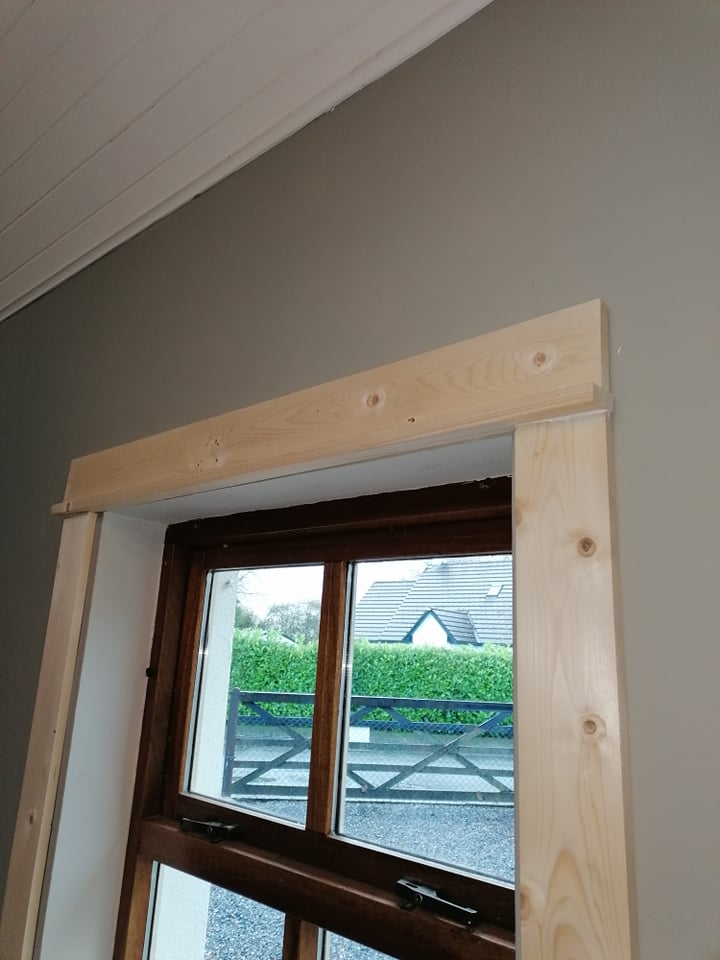
Step Three
Now all I had to do was finish off the top. To do that, I wanted a length of 2 x 1 and a length of 3×1. These were going to be a bit wider that the to others I cut, so again I measured and added an extra 2 inches.
NOTE>> these two boards were also going to be placed like a shelf and needed to be screwed to the flat 4 x 1 that was up there. So … pre-dill your holes and then when your are up the ladder its easy to secure them. The photo below shows the last 2 x 1 in place and just before I screwed on the 3 x 1.
Hope you guys are still with me ??!!??

After it was finished , I stepped back and looked at it. Then I thought it needed another 4 x 1 underneath the window sill. I had to actually screw this one to the wall as the no more nails wouldnt hold it on its own. And then lots of caulk to fill in between the sill and the board.
Step Four
The it was time to prime. You need to use a blocking primer on raw pine and teak( I was obviously painting the window too) . I used BLOXX IT click here. And an off white paint called Shabby Vintage Lace in colour perfect advanced satinwood. T0 say it turned out better than expected, is putting it mildly. I love it so much and it has sparked me into doing the same at the other end of the room, on the patio doors. You can follow my progress here on INSTAGRAM STORIES

Here is the final result Hope you like it and if you give it a go , tag @shabby.ie, so dont miss it.
Thanks for following along with all my projects. Check out my INSTAGRAM HIGHLIGHTS for many more
Aileen